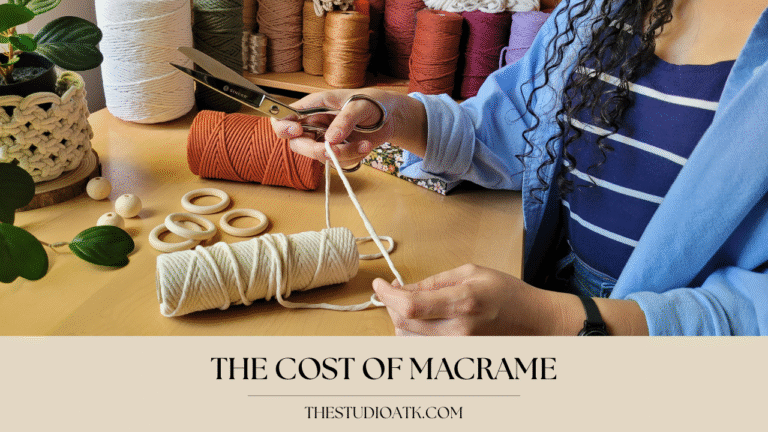
Intro
Learning macrame can feel a little overwhelming at first — all those cords crossing and twisting can look confusing! But don’t worry, you’ve got this. With just a few basic macrame knots, you’ll be able to create beautiful handmade projects like wall hangings, plant hangers, and even small decorations for your home.
This easy macrame tutorial for beginners will walk you step by step through the 4 most important macrame knots. Once you master these, you’ll have a strong foundation to start almost any macrame project with confidence.
Today, you’ll learn how to tie:
- Lark’s Head Knot
- Square Knot
- Double Half Hitch Knot
- Gathering Knot
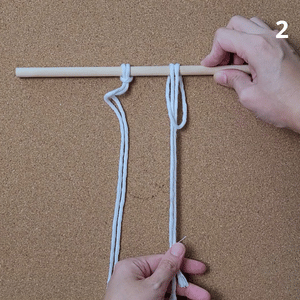
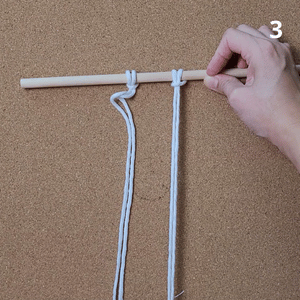
Lark’s Head Knot (LHK)
The Lark’s Head Knot is most often used in the mounting process—when you attach cords to a dowel, branch, ring, or to other cords to begin your project.
How to tie a Lark’s Head Knot:
- Fold your cord in half.
- Place the folded loop over and behind your dowel.
- Pull the ends of the cord through the loop and tighten.
This is the knot you’ll use to start almost every macrame project.

Square Knot (SK)
The Square Knot is one of the most versatile and commonly used macrame knots. You can create endless variations and patterns with it.
You’ll need four cords:
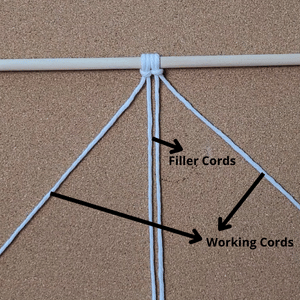
Two outer cords = working cords (used to tie the knot).
Two middle cords = filler cords (stay in place while the knot is tied around them).
How to tie a Square Knot (right-facing):
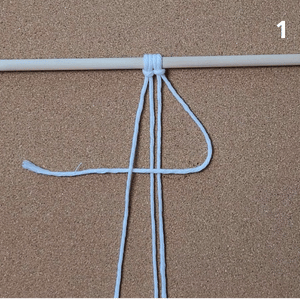
1. Take the right working cord. Pass it over the filler cords and under the left working cord, forming a “4” shape.
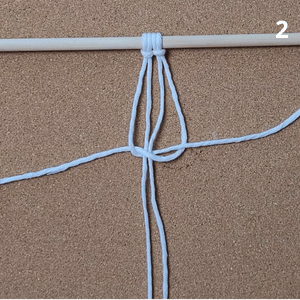
2. Move the left working cord behind the filler cords and through the loop on the right.
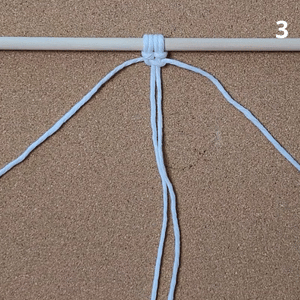
3. Pull both cords to tighten.
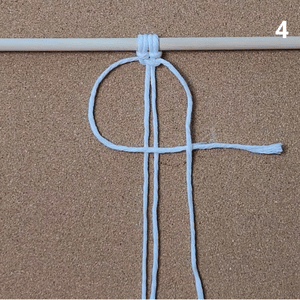
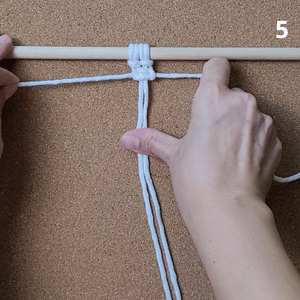
4. For the second half: bring the left working cord over the filler cords and under the right cord.
5. Pass the right cord behind the filler cords and through the loop on the left. Pull tight to finish your Square Knot.
This is one of the most versatile knots in macrame — you’ll use it in everything from coasters to wall hangings.
Come knot along with me — watch the full tutorial here!
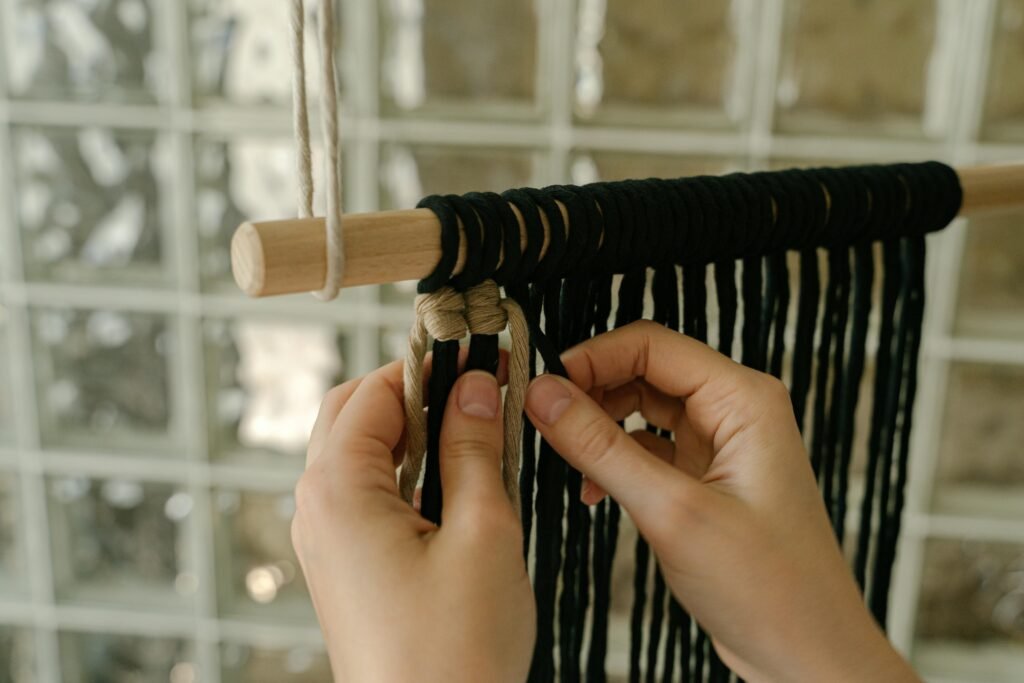
Double Half Hitch Knot (DHHK)
Also called the Clove Hitch or Festone Knot, this knot may feel tricky at first but is essential for making straight lines, curves, geometric patterns, and shapes in macrame designs.
The double half hitch knot can be intimidating at first. But, once you understand the idea behind this knot, you will see that is quite simple.
There are two ways to create this knot: a horizontal or vertical setting.
Horizontal DHHK
How to tie a Horizontal DHHK:
[pictures]
- Hold your filler cord towards the direction you want your line to go.
- Take the first working cord (it should be under/behind the filler cord), wrap it over and around the filler cord, passing through the loop. Pull tight.
- Repeat the process with the same working cord to complete the knot.
Vertical DHHK
The Vertical DHHK is often used to create pixel-style macrame patterns or to highlight color changes.
How to tie a Vertical DHHK:
[pictures]
- Place the working cord behind the filler cords.
- Bring it over the filler cords to the left, then through the loop on the right.
- Pull tight.
- Repeat one more time to complete the knot.
Come knot along with me — watch the full tutorial here!
Gathering Knot (a.k.a. Wrapping Knot or Invisible Knot)
The Gathering Knot is used to neatly secure a bundle of cords, usually at the beginning or end of a project. It’s a finishing knot that gives your piece a clean, professional look.
How to tie a Gathering Knot:
1. Take an extra cord (about 40–50 cm) and fold one end into a “U” shape.
2. Place the “U” against your bundle of cords, with the loop pointing downward.
3. Wrap the long end of the cord tightly around the bundle and over the “U.”
4. When you’re done wrapping, pass the long end through the loop.
5. Pull the short end at the top to draw the loop inside and secure it.
6. Trim the excess cord for a neat finish.
Wrapping It Up
With these 4 basic macrame knots, you’re all set to start creating beautiful handmade pieces. Whether it’s a cozy wall hanging, a simple plant hanger, or a little decorative touch for your home, the possibilities are endless.
I’d be so happy to see what you make! If you try this tutorial, share your creations on Instagram and tag me @studio_atk — I love celebrating your work.
Want more inspiration? Take a look at my other macrame tutorials below and keep knotting your way to something beautiful!
Until next knot…