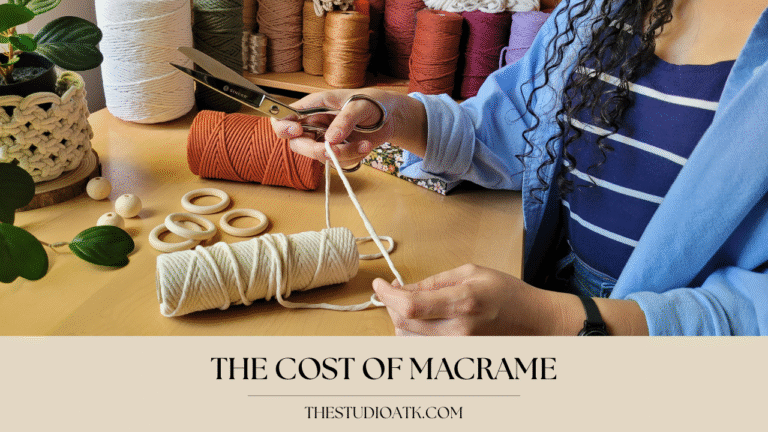
The square knot is one of the most important knots in macrame. If you are just starting your macrame journey, this is usually the first knot you will learn — and for good reason. It is versatile, strong, and creates a beautiful flat texture that works in many different projects.
From wall hangings and plant hangers to bags, bracelets, and decorative designs, the square knot is truly a foundation technique. Once you understand how it works, you can combine it with other knots to create endless patterns and textures.
In this article, we’ll explore the basics of the square knot, including how it is structured and the difference between filler cords and working cords.
What Is a Square Knot?
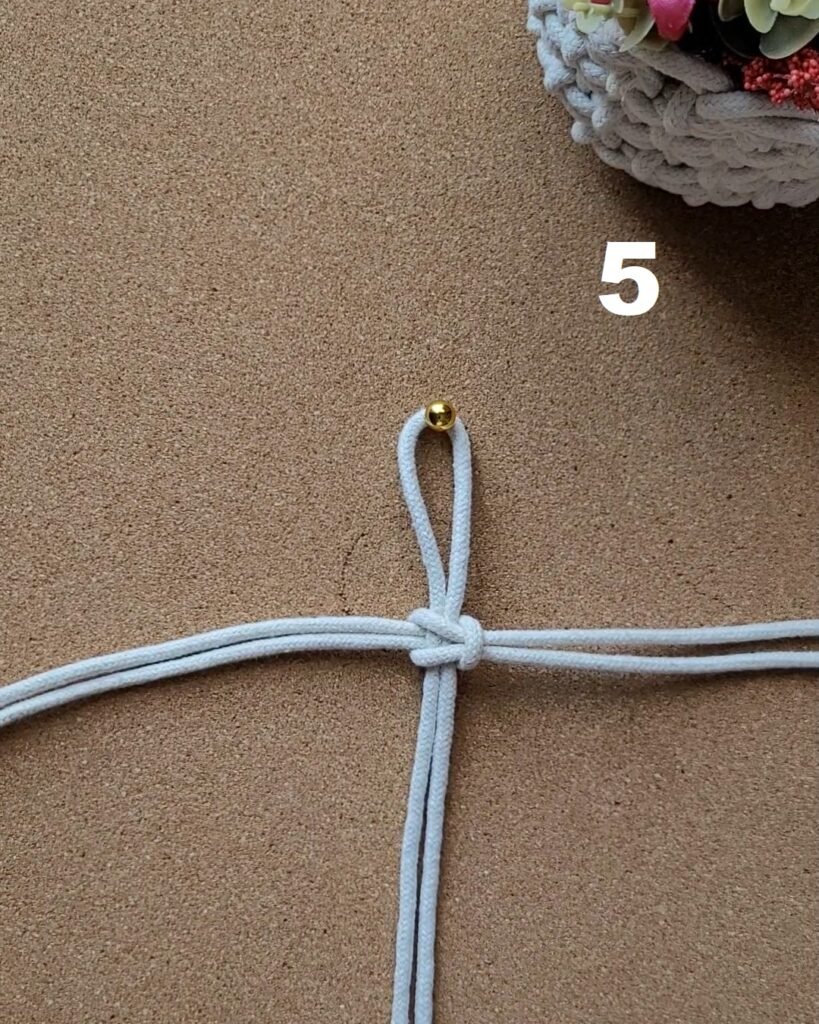
A square knot is created by tying two half knots in opposite directions. When done correctly, the knot sits flat and balanced.
If you repeat the same half knot in the same direction without alternating sides, you will create a spiral instead of a square knot. This is a very common beginner mistake, but it is also a useful technique when you want a twisted design.
The key to a square knot is alternating sides:
Left side strand first, then right → Left-facing
Or right side first, then left → Right-facing
Both methods produce the same result. The only difference is where the “head” of the knot will sit.
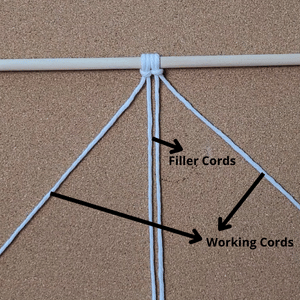
Understanding Filler Cords and Working Cords
One of the most important concepts in macrame is the difference between filler cords and working cords.
Filler Cords
Filler cords are the cords that stay in the center of the knot. They provide structure and support, but they do not move much during the knotting process.
Think of filler cords as the “core” of your project.
Depending on your design, you may have:
One filler cord
Two filler cords
Multiple filler cords grouped together
The number of filler cords can change the thickness and appearance of your knots.
Working Cords
Working cords are the cords that actively move to form the knot. They wrap around the filler cords and create the visible pattern.
In a basic square knot setup:
The outer cords are working cords
The center cords are filler cords
Understanding this difference makes it much easier to learn new knots and patterns later.
Why the Square Knot Is So Important
The square knot is not just a beginner knot. It is used in many advanced designs as well.
Here are some reasons why it is so essential:
✔ Creates a strong and secure structure ✔ Works in both decorative and functional projects ✔ Can be combined into patterns and textures ✔ Forms the base for many other knots ✔ Easy to learn and very versatile
Many macrame projects are built almost entirely from square knots and their variations.
Different Ways to Start a Square Knot
One of the interesting things about the square knot is that there isn’t only one way to start it. Depending on your project, you can use different setups.
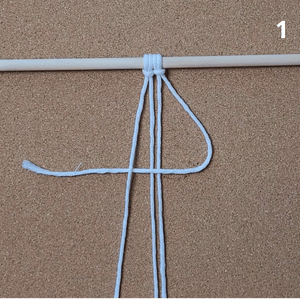
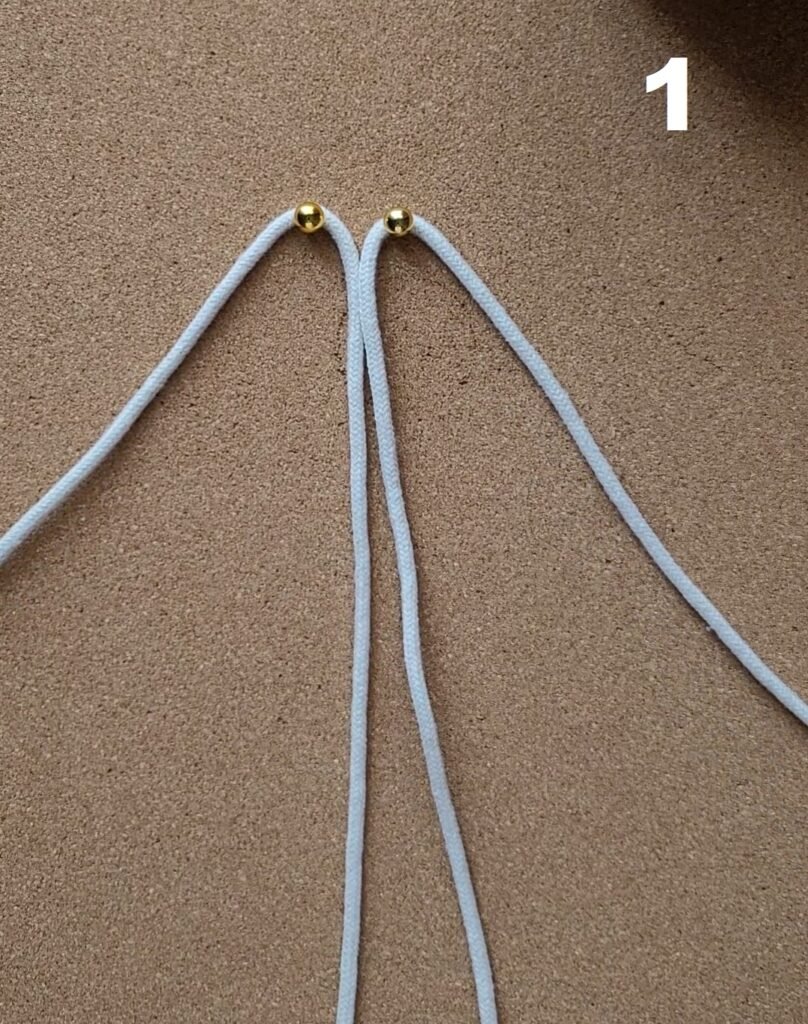
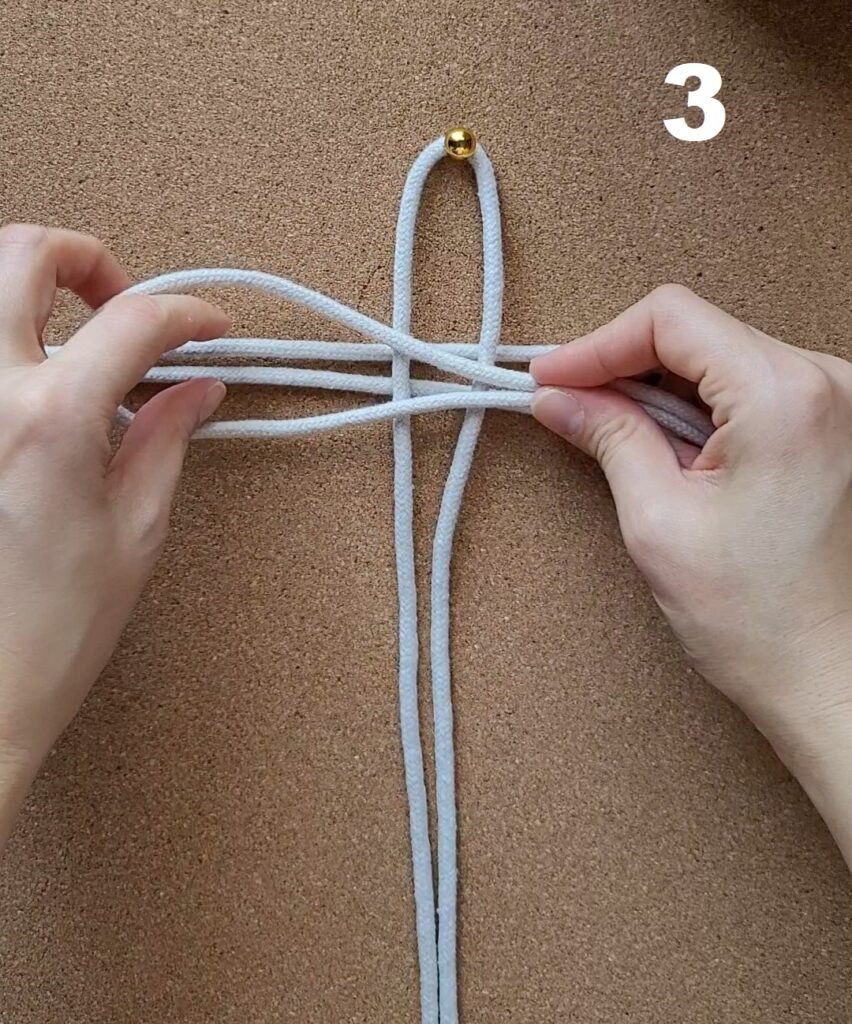
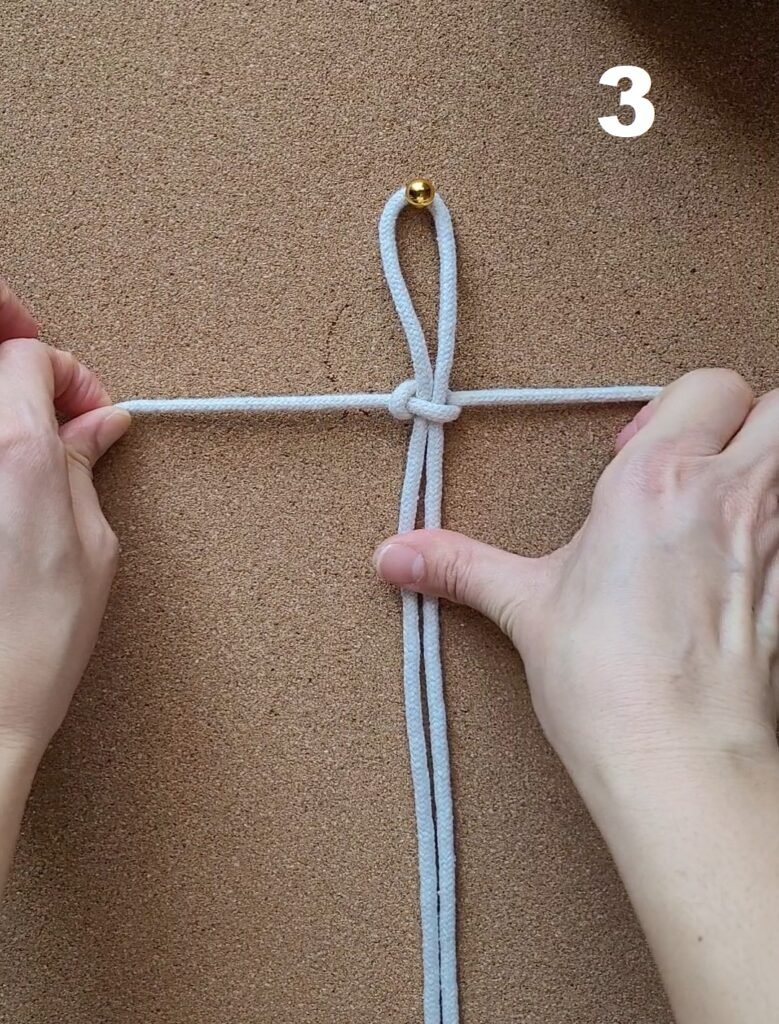
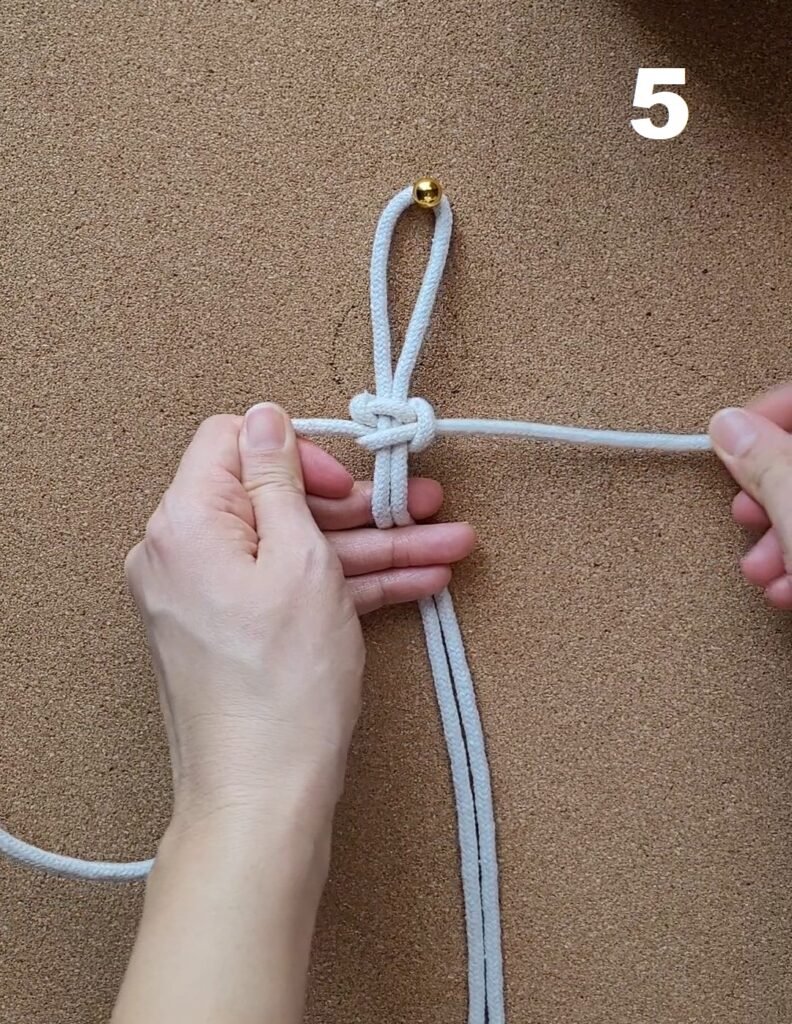
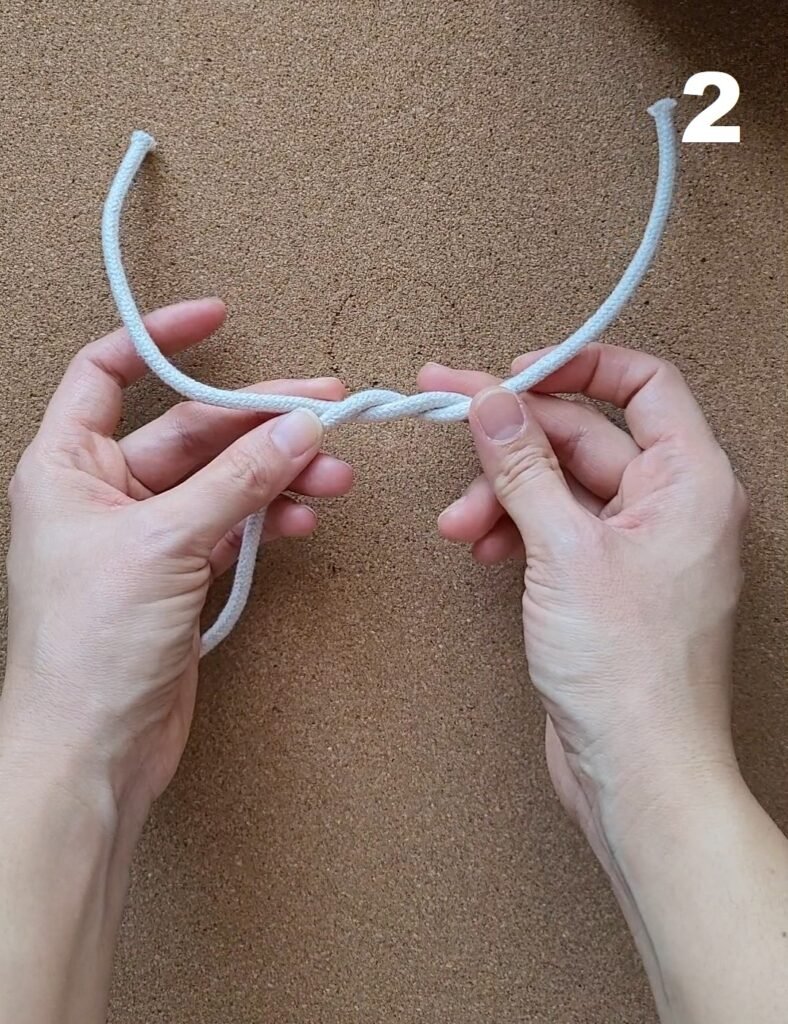
Before we go into that, below you will see how a square knot is tied. I personally prefer to start with a right-facing square knot, and that is what I am going to show you.
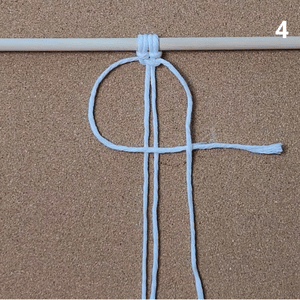
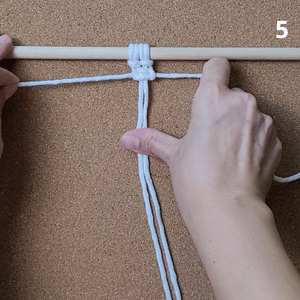
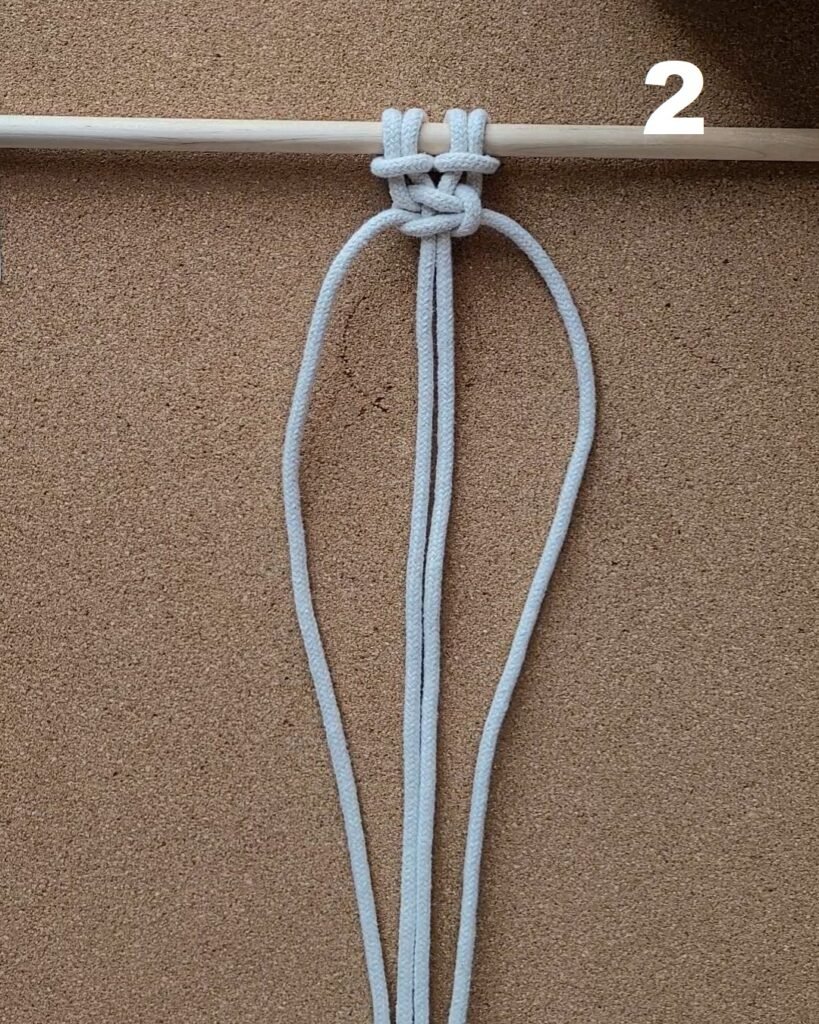
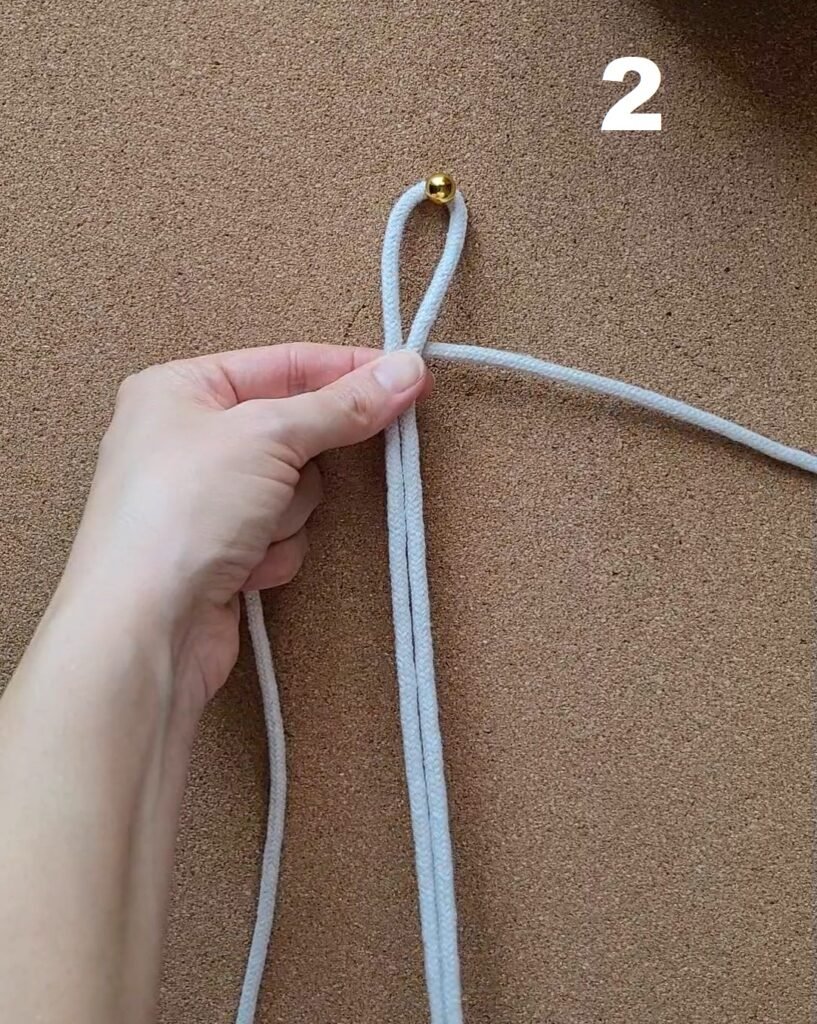
Right-facing: Take the right working cord. Pass it over the filler cords and under the left working cord, forming a “4” shape.
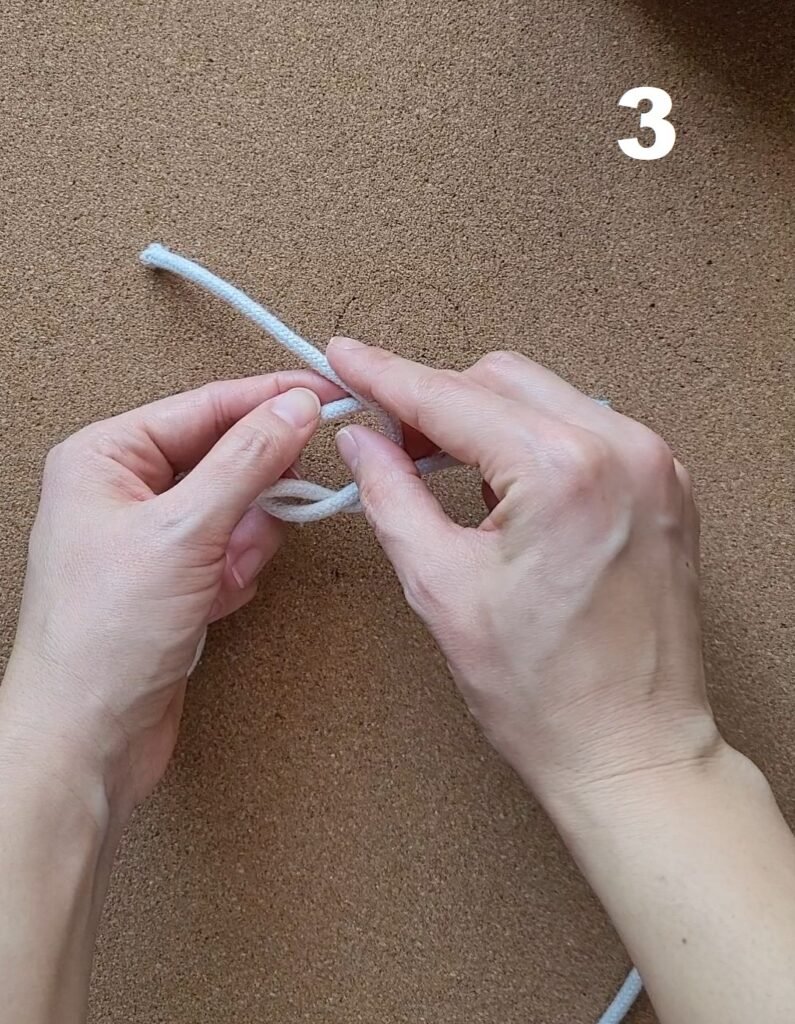
Move the left working cord behind the filler cords and through the loop on the right.
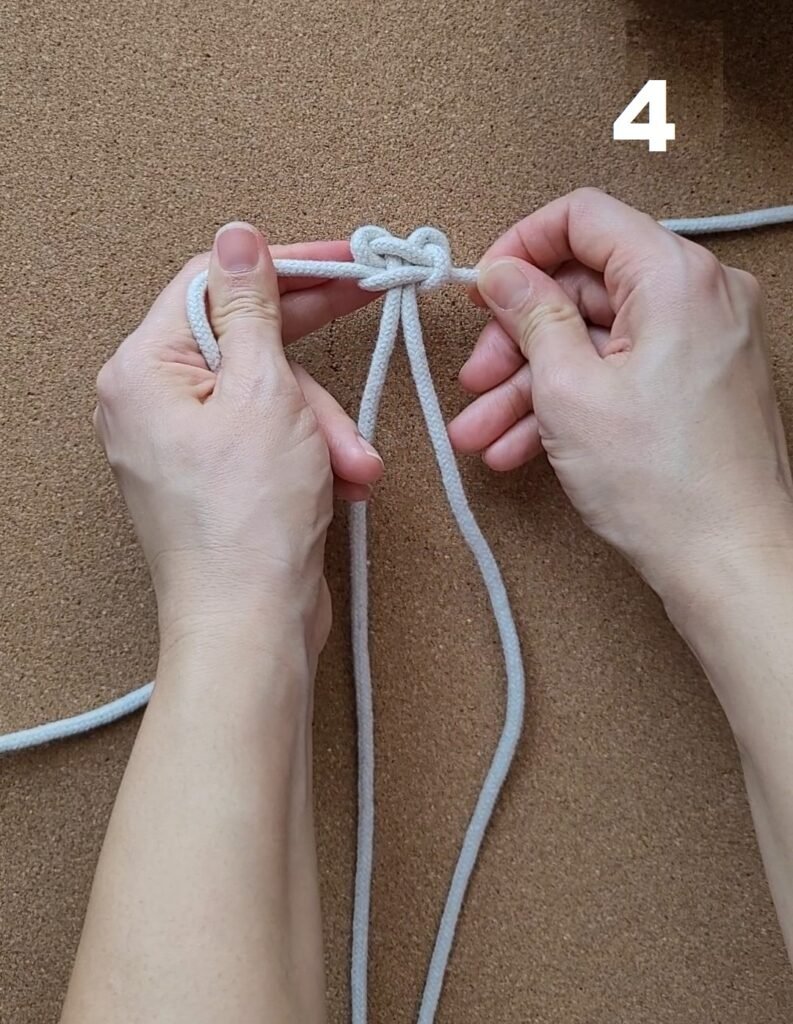
Pull both cords to tighten.
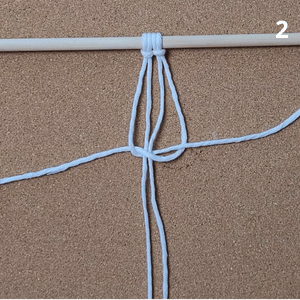
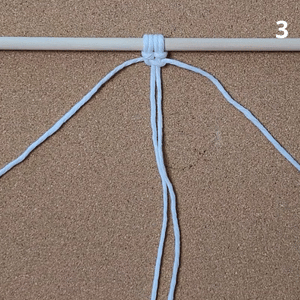
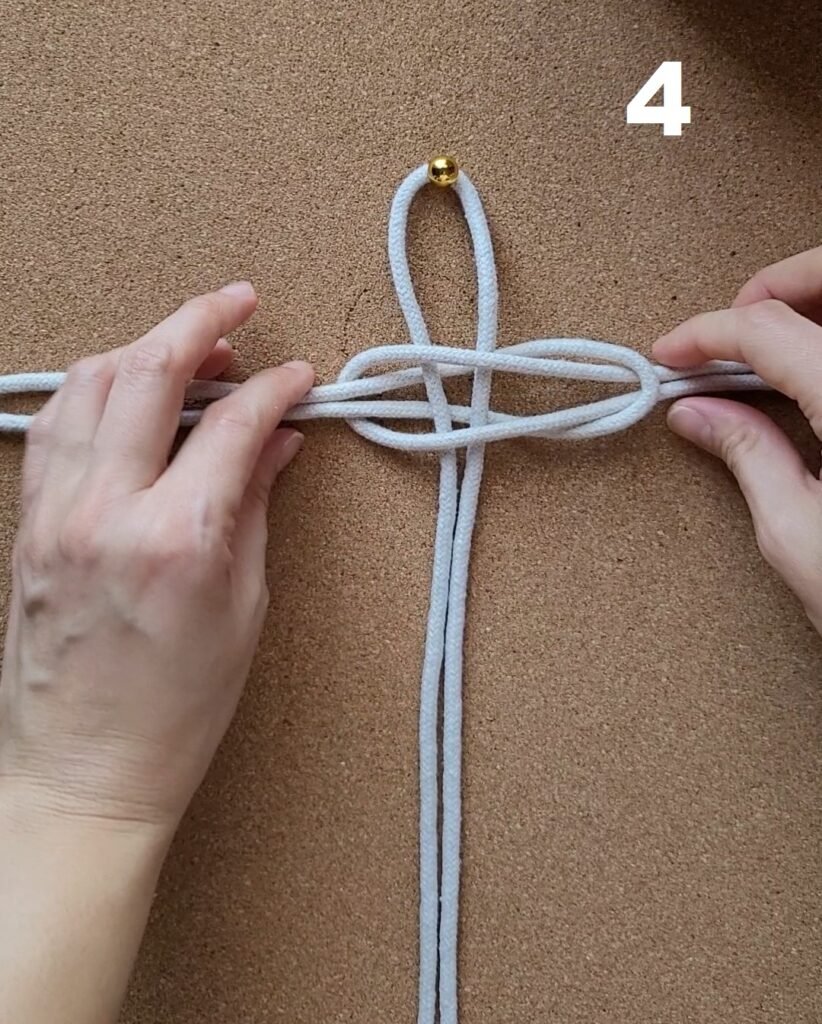
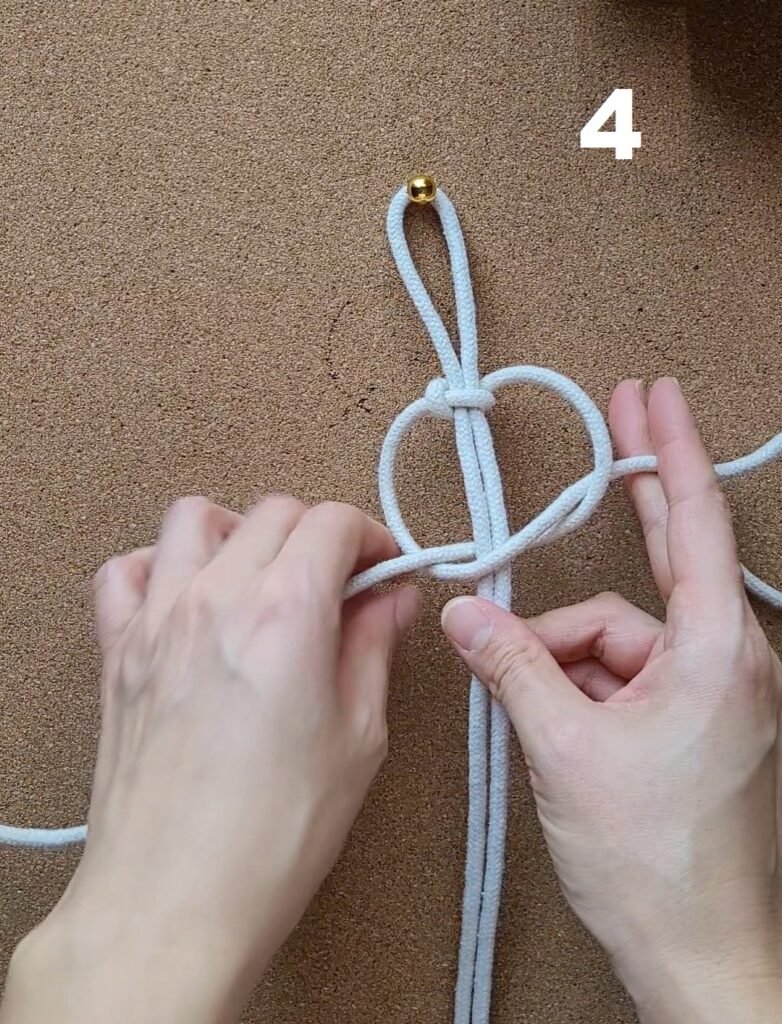
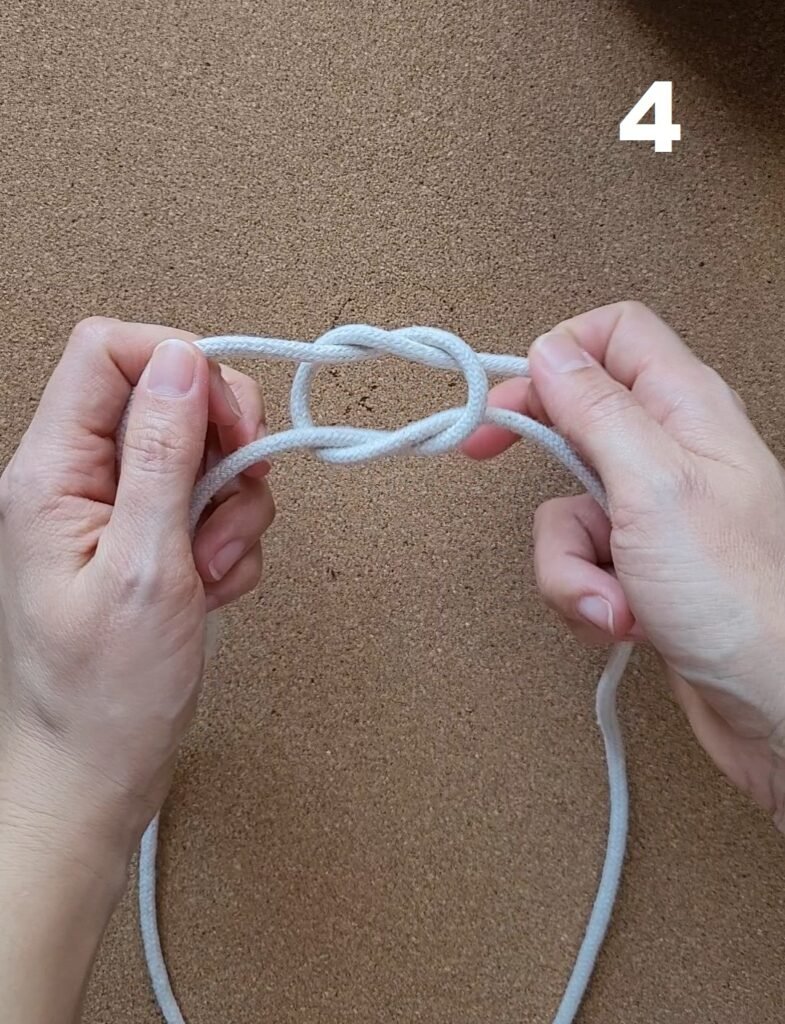
Second half: Bring the left working cord over the filler cords and under the right cord.
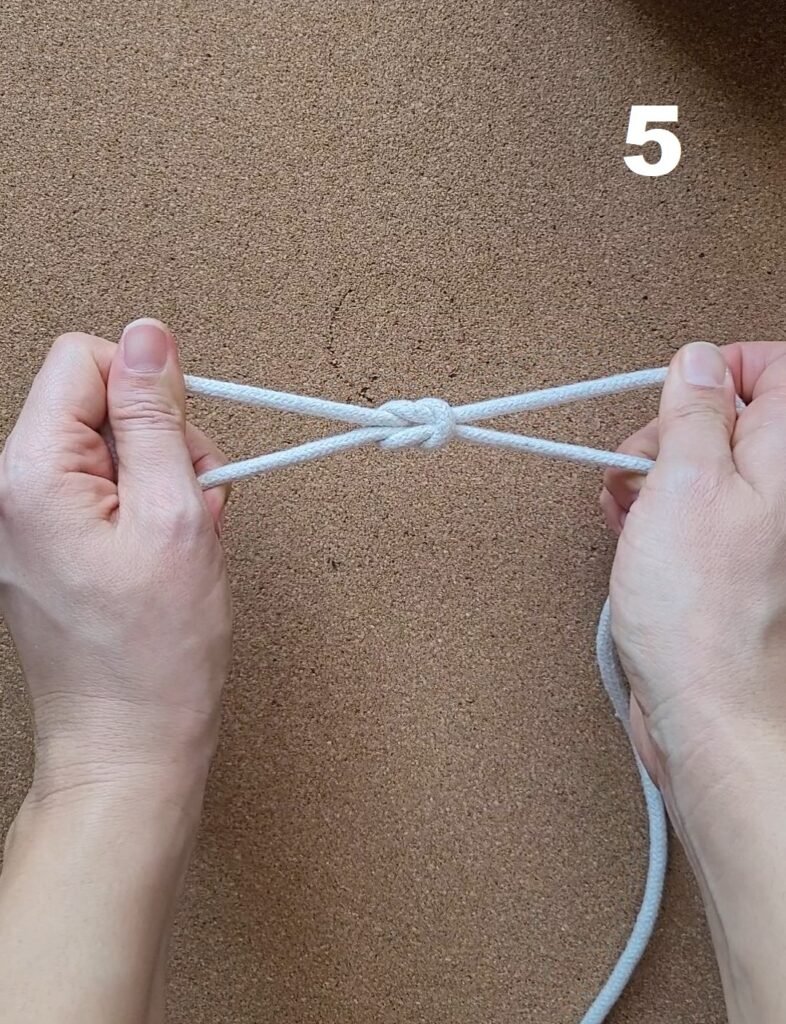
Pass the right cord behind the filler cords and through the loop on the left. Pull tight to finish your square knot.
Now that you know how to tie a square knot, below I will show you five different ways you can start tying one.
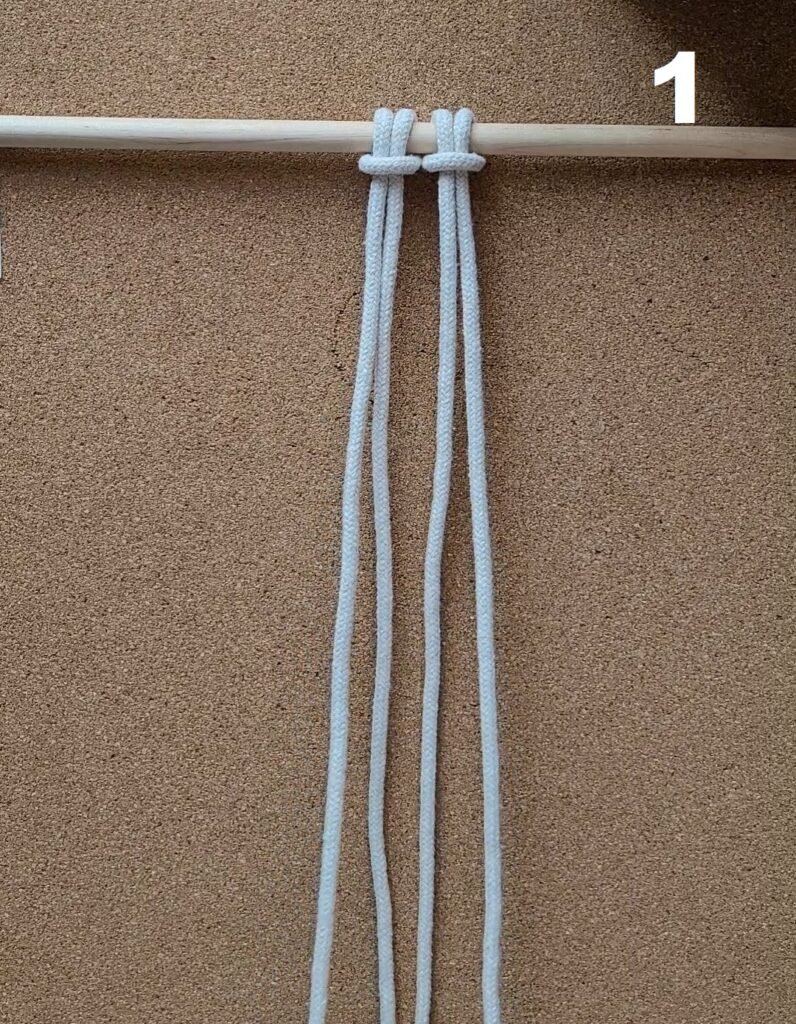
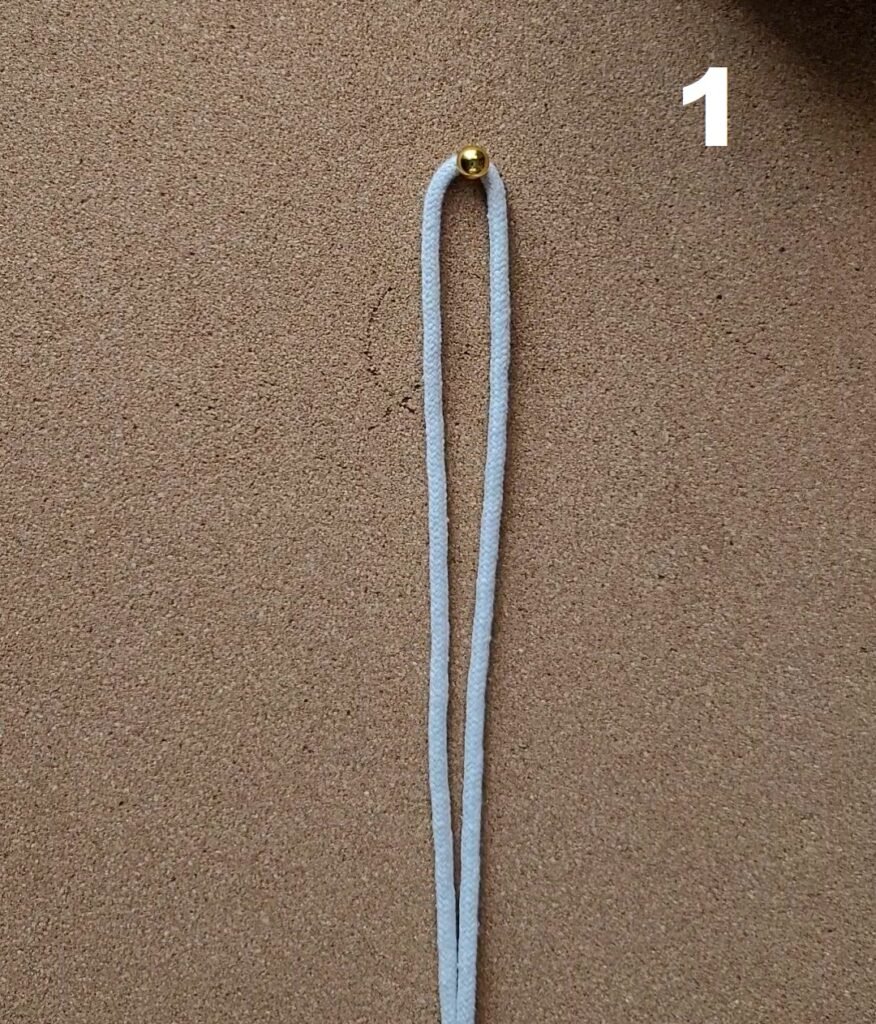
Standard Method — Mounted Cords on an Anchor
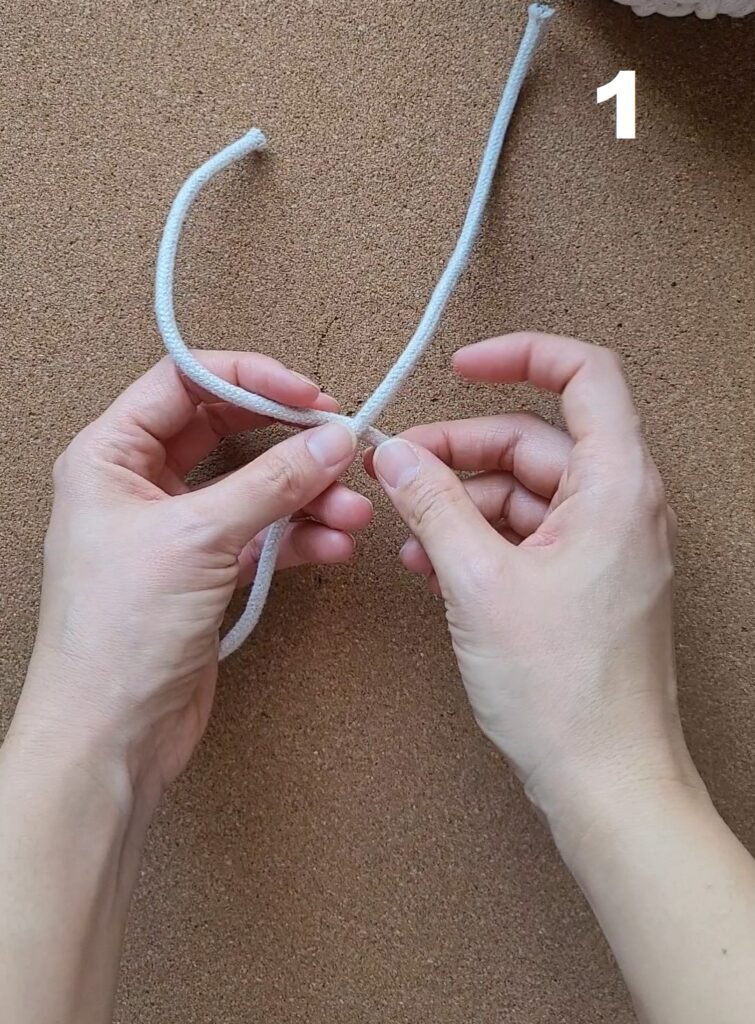
You start with two cords folded in half and attached to an anchor point. The anchor point could be a dowel, ring, hook, or even another cord.
You will have four strands:
The two outer strands are the working cords
The two center strands are the filler cords
Folded Cords Without an Anchor — Single Square Knot Method
There is no anchor point to start this method. You fold two cords in half and place them side by side.
You still have four strands to tie the knot, but you will create a single, free square knot without being attached to anything.
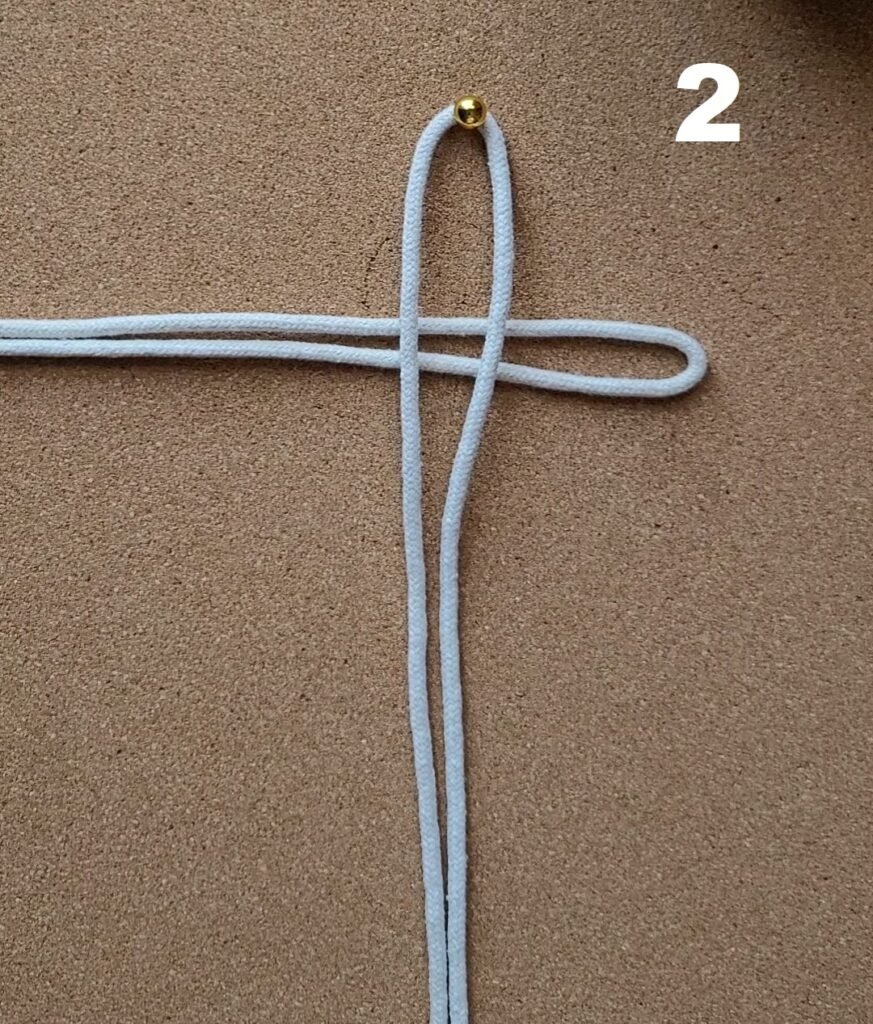
Loop-Linked Square Knot Method
Start with a cord that can be folded in half and placed vertically. This will be the filler cord.
Take one cord, fold it in half, and place it horizontally under the filler cord. Take another cord, fold it in half, and place it horizontally over the other cords.
Then link the two horizontal cords together and tighten to form the knot.
Single Working Cord Method
Start with a cord that can be folded in half and placed vertically. This will be the filler cord.
Take one cord, fold it in half, and place the center part under the filler cord. You should have two outer strands that will act as your working cords to form the square knot.
No Filler Cord Method
Start with two separate strands.
Place the left strand over the right one. Wrap the left strand around the right one from top, back, down, and front to create a half knot.
Then alternate the direction: Start with the right strand over the left one. Wrap the right strand around the left one from top, back, down, and front to complete the square knot.
Learning different setups gives you more flexibility when designing your own projects.
I would like to mention that all of these method names are ones I created myself, since I could not find much information specifically describing these variations. If you know the “official” name for any of these macrame setups, please feel free to share!
Watch the Tutorial
If you’d like to see these techniques in action, you can watch my short video showing different ways to start a square knot.
Watch the Short here 👇
And if you want to learn more foundational knots, I also have a video covering the five basic macrame knots every beginner should know.
Watch the Video here 👇
Final Thoughts
Mastering the square knot is one of the biggest steps in becoming confident with macrame. Once you understand how filler cords and working cords interact, many other knots will start to make more sense.
If you are a beginner, don’t worry about perfection at first. Consistent tension and practice will naturally improve your knots over time.
Want more inspiration? Take a look at my other macrame tutorials below and keep knotting your way to something beautiful!