
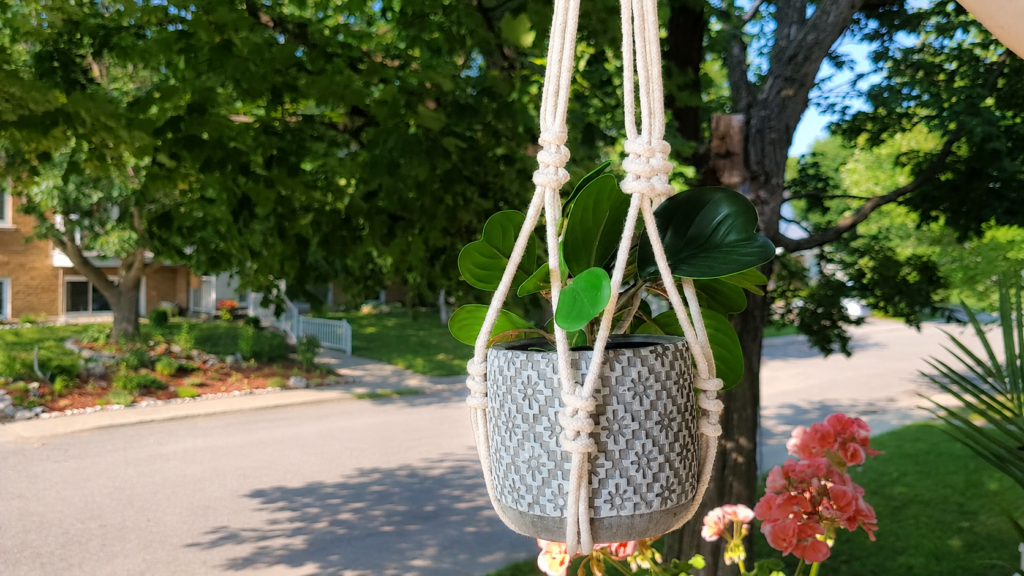
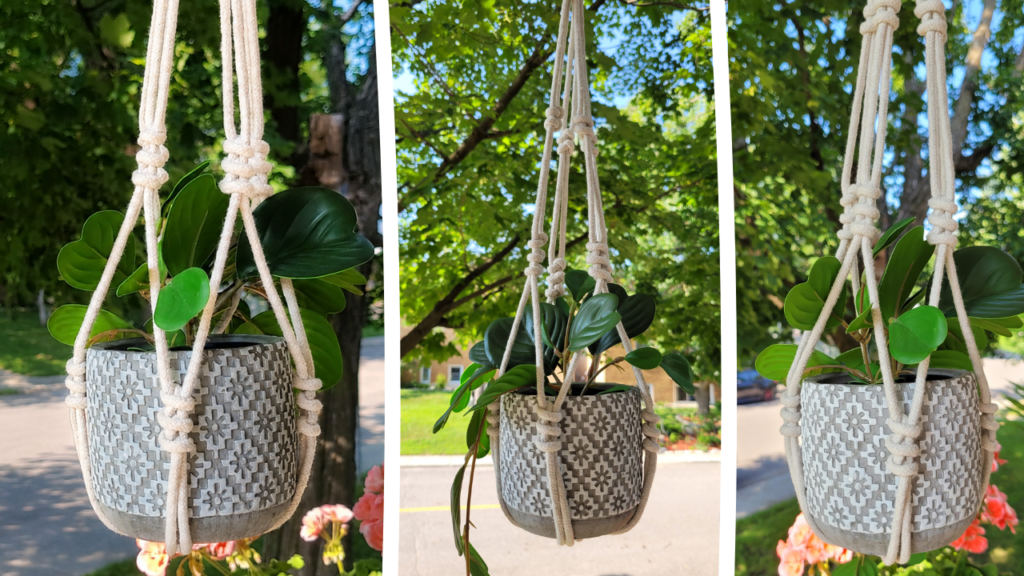
There’s a special kind of satisfaction in making something for your home that feels both simple to create and striking to look at. This macrame plant hanger is exactly that kind of project. Clean lines, a modern silhouette, and a little handmade detail that makes it stand out from a typical hanger.
For the pattern, I used a knot I like to call a variation of the Barrel knot. It’s simple to learn, but it gives the piece such a distinct textured look that it feels much more elevated than the steps required to make it.
About This Macrame Plant Hanger
What drew me to this design was how much personality the Barrel knot variation brings to such a minimal piece. The small sennits it creates add just the right amount of texture, without ever feeling busy or overdone. And because there’s no tassel finishing off the bottom, the whole piece reads as sleek and modern, perfect if you want something that feels a little more contemporary than the traditional bohemian look.
This plant hanger measures approximately 56cm long, making it a great size for most houseplants, whether you’re hanging it near a sunny window or out on a balcony.
Materials You Will Need
🧵 MACRAME CORDS:
- 4mm braided cotton cord with filling in natural color:
- 4x of 2m long.
- 1x of 80cm long.
✂️OTHER MATERIALS:
- Wooden ring – 5cm wide
- Measuring tape
- Cork board and pins (but you should be okay to use some tape as well)
- Scissors
A Note on Cord Choice
I chose a braided cord with filling for this project because it holds its shape well and adds the stability the design needs, but more importantly, it helps the sennits look fuller, which really lets the knot pattern shine.
I did test this same project with a braided cord without filling, but the knot lost that fuller, more sculptural look I wanted. That said, if you’d prefer a more delicate and understated version of this hanger, a cord without filling is a lovely alternative.
One more note about this type of cord is that braided cord is generally more resistant and durable than a single strand cord, making it a sturdier choice for pieces like this one. Keep in mind though, if you want something built specifically for the outdoors, a synthetic cord will hold up better against moisture and sun than a natural fiber like cotton.
Macrame Knots & Techniques Used
- Square Knot
- Barrel Knot variation
For a while, I didn’t actually know what to call this particular knot. It wasn’t until I’d practiced it more and tried out other knots that I realized the movement was quite similar to the Barrel knot, so I decided to call this once-nameless knot a Barrel knot variation.
The Barrel knot is traditionally a finishing knot, used to add texture to the fringe or to the cord itself, or prevent the cord from fraying. For this project, I created the variation by using two cords instead of one, and tightening the knot by pulling the loose end rather than the top of the cord. The result is a similar textured look, but with a slightly different technique. I show this comparison in the video tutorial linked below.
New to macrame? No problem, here are a couple of videos covering the knots used in this project:
👉 Macrame Tutorial Mini Bag | Daisy Flower Strap
👉 Macrame Single Barrel Knot Sennit
Watch the Step-by-Step Video Tutorial
You can follow the full tutorial here 👇
💡 If the video feels too fast at any moment, remember you can always adjust the playback speed in your video settings.
A Few Tips Before You Start
- Keep your tension even as you work through each knot. This is really what gives the finished piece that clean, minimalist feel, so it’s worth taking your time here.
- This version is on the shorter side. If you’d like a longer plant hanger, simply start with longer cords, using 2.5m to 3m should bring your finished piece to roughly 60–80cm long.
- For the gathering knot at the top of the plant hanger, if you’d like extra support, you can wrap the cord a few more times than the 5 wraps I used here — just make sure to use a longer piece of cord for this, about 1m to 1.2m, so you have enough to work with. Also, keep in mind that if you’re using a thinner cord or a braided cord without filling, you’ll want to make the gathering knot slightly bigger to compensate.
Final Thoughts
This is one of those projects that’s just as fun to make a second and third time, especially once you start experimenting with different cord colors, or tweaking the pattern a bit, like using a longer sennit, for example.
I’d love to see how yours turns out! Share a photo and tag me on Instagram @studio_atk . It always makes my day to see your creations.
Thank you so much for being here and following along. It truly means so much.
Happy knotting ♥